Monday, February 17, 2014

The Beginning of My ItWorks! Journey

Hey all! I've been out of the blogging world for quite some time because with I'm now back in school full time as well as working a part time job AND a full time 8-5 job. AND training for my first marathon in April (yeah, I know.. I'm a crazy person). However, in the beginning of February I decided to become an independent distributor for ItWorks Global.


Well, ItWorks was actually introduced to me by Garret's older sister, Kylee. She told me about the variety of products and supplements that help promote health and weight loss. And aside from helping people, it's a great way to make some extra money. So, I decided to do more research and after a month (yes, a month), I decided to sign up and give it a go.

So far, it has been GREAT. The team I'm on is very, very supportive and knowledgeable of all the products and the business. It's so wonderful to know that any time I have a question, someone has the answer.

To be 100% honest, I was a bit of a skeptic before signing up because I didn't want to apart of the whole "Avon/Marykay" life, however ItWorks sells a product unlike any other out there for AN AFFORDABLE PRICE.

Now, let's get into some of the products!!

The one product that ItWorks is known for that basically gets people hooked, are the body wraps. The wraps are all natural and are made to tone, tighten, and firm problem areas. There is a special defining gel on the wrap that promotes a detox throughout the fat cells. The wrap is to be worn for 45 minutes and can be done every 72 hours. It is important to drink LOTS of water while wrapping and the next days after because the wrap continues to work.

 The body wrap isn't a "miracle" drug, it is to be combined with good nutrition and exercise. It is perfect for anyone who wants smooth and hydrated skin all year long.

Steps to wrapping


customer results after 4 wraps
I actually tried my FIRST wrap last week and was quite surprised how it worked. While wearing it, it gives you this cooling sensation on the area you apply the wrap. And no my results weren't incredibly dramatic ,but it did leave my stomach looking toned and my skin was so soft. The best part was, the next few days after, my stomach was still toned and I felt very refreshed. I am excited to start incorporating these wraps with my normal work out routine. The picture below is actually me doing my first wrap (ignore the messy room).


Another one of my favorite products are the GREENS. GREENS is a drink powder equivalent to 8 servings of fruits and vegetables. It's good for detoxing and building a strong immune system. I LOVE IT. I drink it everyday and feel great. I mix mine with water, but it can be mixed into smoothies, juice, or whatever you prefer.

 
That's my blender bottle and GREENS mix above!
 
 
Aside from the wraps and greens, ItWorks offers protein powders, vitamins and all sorts of great products to kick start any diet and work out plan.
 
 
I know you're probably wondering "If Jessica is so busy, why would she take on, ONE MORE PROJECT?" ha, well I often wonder that too, but I did it for the freedom of time. I've always been busy with school and work and I don't take enough time for the people in my life or myself. ItWorks has given SO MANY PEOPLE the freedom of time and the ability to work from home or as a way to supplement some extra cash each month. No, I'm not expecting to become some millionaire over night or ever, but I would like to take charge of my time and spend it doing things that make me happy. And I firmly believe in this opportunity that has been presented to me.
 
 
So, if you want to join my team and start making some extra money or are interested in trying any of the products, visit my website at jwinslow@myitworks.com ,send me a text at 314-497-8096, or just comment below!


Thursday, December 19, 2013

Easy Monkey Bread

Ok. To start this off, I have a confession. I am the world's worst blogger out there. I swear if there was an award for the worst blogger known to man kind, it would be me. Seriously, the other day I was reading a blog about "how to blog" (trivial I know), but anyways the author made such a good point when she said "Do not start a blog unless you have 50 ideas all ready to go, and you can make time for them". Well see the thing is, I have TONS of ideas (like A MILLION) but I never make time to document them. So, I'll make a promise to start posting more of my BRILLIANT thoughts and ideals :)

Now, on to the good stuff....


One weekend at Garret's parents house, his mom kept talking about how she was going to make monkey bread and what not and the entire time I'm thinking (that seems wayyyyy to hard for me to ever attempt). Well, she vaguely told me some recipe and it seemed simple enough, so I decided to give it go.


All you need are two cans of biscuit dough (I used the GRANDS version), a stick of butter, cinnamon, brown sugar and white sugar. I almost forgot to mention you'll need cooking spray AND  bundt pan.


Using a knife or pizza cutter, cut each individual biscuit into fourths
 
 
Toss your cut biscuit fourths in a cinnamon/sugar mixture
 
 
Arrange your pieces evenly in a GREASED bundt pan


Finally, pour your melted butter/brown sugar mixture over top
 
 
Your ending result should look something like this. Wait about 10-15 minutes for the bread to cool and lastly, flip the bread onto a plate and serve!


Ingredients
  • 1/2 Cup sugar
  • 1 teaspoon cinnamon
  • 2 cans refrigerated buttermilk biscuits
  • 1 stick of melted butter or margarine
  • I cup packed brown sugar
 
Instructions
  1. Heat oven to 350. Grease bundt pan.
  2. In a large mixing bowl, mix sugar and cinnamon.
  3.  Separate dough into fourths. Then coat inside mixture.
  4. Arrange in pan. In a small bowl, mix brown sugar and butter; pour over biscuit pieces.
  5. Bake 28-32 minutes or until golden brown and no longer doughy in center.
  6. Cool in pan 10 minutes. Turn upside down onto serving plate.
I wrapped the left overs in plastic and put into the microwave before serving again.
 
This bread was heavenly and I am not sure of the caloric intake of it and quite frankly I don't care. It was a perfect and east treat for a Sunday breakfast and I will definitely be making this again.
 
Enjoy!


Tuesday, November 5, 2013

Fall Wreath


Okay, so as I've mentioned before, I.LOVE.WREATHS. And with all the gorgeous colors fall has to offer, comes even more gorgeous wreaths. My sister had been wanting a wreath made for a while so I figured what a perfect way to try something new.

To be honest, this isn't a post to show you how to make a wreath, but more as an "inspiration" for your own. The funny thing is, the entire wreath only cost me about 10.00 to make. The grapevine wreath was purchased at hobby lobby, the large, deep red colored sunflowers were left overs that I had from another project (also from hob lobs)

EVERYTHING else was purchased at the dollar store. Yep, the dollar store. From the flowers, to the leaves, to even the cute little pumpkins and gourds. I tend to doubt the dollar store for some things looking "cheap", but I am pretty impressed with the way this turned out.
 
Although it took a few days to complete and a WHOLE lot of glue gun sticks, I think it turned out beautifully and my sister is happy with it and that's all that matters.

Thanks and Happy Fall!


Wednesday, October 30, 2013

Simple Wreath Tutorial


One of my all time favorite things to do (besides running and drinking wine) is to make wreaths. I love them, I swear I don't have enough doors to hang them all. I'm almost positive you can have a wreath for every time of the year. Winter, Spring, Fall, Summer, 4th of July, Christmas, Thanksgiving, Easter, Valentines day, labor day, flag day, MLK day, my birthday, okay you get the point. But if there is day, there is a themed wreath to go along with it.

I always hear people tell me. "Well I'm not crafty enough to make a wreath" or "I don't have time to make a wreath". Lies. I'm going to show you how to make a simple wreath that only took me around 25 minutes and 15.00 dollars to make.

Things You'll Need
  • Grapevine wreath
  • Glue gun
  • Accessories
  • Scissors

As you can see I have a random array of things. However, as for my "accessories" for my wreath, I chose hydrangeas (duh), letters and burlap.

First, when you using flowers, it's always best to "de-stem" them.


I actually cut the stems all the way up to the actual flower for easier gluing.

Then, I wanted to make a bow out of burlap. And I know, bows can be scary to make, however I found this method to make bows a while back and realized "why didn't I think of this absolutely genius method?!" Anyways, to start off making the bow you want to just cross whatever material you are using.

Then using your glue gun, make a "strap". (This will be used to actually keep the bow together)


Finally just pinch in the middle and glue. Viola! A perfect bow.
 
After that, I just painted my letters to the color of my liking and attached everything to the wreath.


And there you have it, everything I used for this wreath costs me around 15 dollars! The flowers were on a great sale at Michaels, about $5.00 for all. The wooden letters and heart were around a dollar each from Hobby Lobby and the burlap and wreath were about 6.00 dollars also from Hob Lobs. Another tip for getting a good deal are the coupons that Hobby Lobby offers (40% off a regular price item) and yes, they are wonderful.

Thanks!


Monday, October 14, 2013

DIY Coasters


As much as I loooooove extreme furniture make overs and wreaths that take me days to complete, I always enjoy an easy craft to relax on a Sunday.

These coasters only took me about 20 minutes to make and I love them. Even better is that they didn't involve anything too fancy or extreme.

What you'll need
- Tile or a backsplash piece
- Felt (I've seen some done with a cork board, but I preferred felt)
- Glue gun
- Scissors

 
Believe it or not, the tile I used was a backsplash that was technically "gifted to me". The thing is,  Garret's mom loves to craft just as much as I do and she wanted to make these same coasters for me. Well, I kinda found the surprise when visiting one day so she just gave the tile to me to do myself. And I just love the look of the tiles as is. The backsplash was either bought at Home Depot or Lowes on sale. (I'll have to verify)
 
 
First, cut the individual squares from the tiles (there should be a net like backing on the backsplash which allowed easier cutting)

 
Then cut the felt into squares, making sure they line up with your tiles (the one shown above was a mess up, I was busy running my mouth on the phone.. oops!)

 
Once all the felt is cut, then use the glue gun to attach the felt to the backs of the tiles.

 
Lastly, tie the tiles up. I used some twine I had left over from another project and added the key for a cutesy look.

 
And of course I HAD to test them out!


Tuesday, October 8, 2013


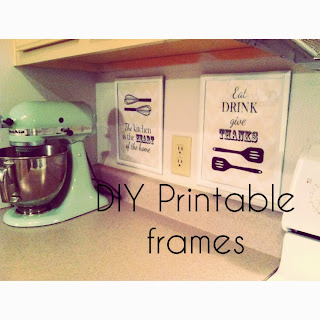
Just recently, I became obsessed with "printables" (yes I know I'm late). Anyways, living in an apartment can be so ..blah. There isn't any color on the walls and it can be feel so ugh. So, one of the first steps to making an apartment more of a home is by hanging pictures (and lots of them).


I came across these adorable kitchen printables one day while wasting time on Pinterest and I'm not very skilled in the graphic design area, so these were perfect. And the best part about it is that they were free! They can be found here

What you'll need
  • Printables
  • Frames
  • Paint
First, find some frames. I found these 8 x 10 frames and the 5 x7 at the dollar store.

 
Then paint them any color you'd like.
I used white spray paint (found at Walmart for .96 cents!)
 
 
After the frames dry, just assemble and hang.
 
 
And there you have it. It's nothing too fancy, but small details here and there go a long way when making an apartment your own.


Friday, October 4, 2013

Ok, to start this whole "blog" thing off let me just share a secret. It took me SO long to actually get enough courage to start one of these. I always thought, "would someone really want to read my thoughts and ideas??" But then I realized, "who wouldn't want fabulous ideas on crafting, baking, running, wine, and sometimes great advice?" Exactly. Thus, Hydrangeas & Wine was born.
 
 Honestly, I just really wanted a place to share all of my glorious DIYs, furniture makeovers, my running secrets, and maybe some random advice along the way. It's nothing fancy and far from perfect but I love it.
Enjoy!
On the beach in Destin
(yes I made those high-waisted shorts)


" "